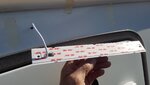
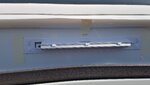
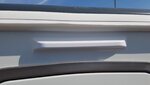
I replaced the awning light on my 2016 Coachman VIP 575/4. I was able to carefully prise the outer casing off the light fitting and leave the original base fixed to the wall. The outer case only clips on. I then replaced the LED strip and outer casing with the new one, which left me with a brand new unused base. To try and prevent a reccurence of the problem, which I believe to be caused by water ingress, mainly from the careless use of a hose to wash the caravan, I put a strip of clear lens tape over the light strip to help protect it.
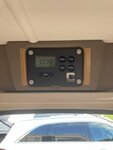
A worse problem was actually getting at the wiring. I had to remove the master control panel from the console above the door. Try as I might, I found this impossible to do this without marking the plastic moulding surrounding the control panel and breaking one of the locationg tabs. This is definitely not designed to be removed. I ended up drilling four small holes in each corner of the control panel and using self tapping screws to fix it in place. This does have the advantage of making it easy to remove the control panel in future though if necessary.
I've actually replaced the screw head covers shown in the picture with dark grey ones which closely match the colour of the control panel so it looks less obvious.