• We hope all of you have a great holiday season and an incredible New Year. Thanks so much for being part of the Practical Caravan community!

DIY project codename DOS/4GW

Page 2 - Passionate about caravans & motorhome? Join our community to share that passion with a global audience!
Jul 15, 2008
3,760
857
20,935
Visit site
.....where is the water coming from for the dishwasher?
A pitch water supply and a waste water drain is very rare on continental campsites.
The pitch electric supply could also be inadequate as has already been said.
However all continental campsites will have a communal dish washing area usually to a high standard.
You proposed removing the caravan shower so you must be OK with using a campsites facilities.
Personally I would go for the addition of a compressor freezer which would be very useful for a family of 5.
We are two retirees and take a 1.5 cu ft compressor freezer for long continental stays.
It supplements the caravan's 3 way refrigerator with its far better cooling performance.
 
Jul 18, 2017
14,553
4,374
40,935
Visit site
We only used fully serviced pitches with water and waste water hookups on the continent and did not find it too much of a problem.

On a number of continental sites you can rent a fridge or ice blocks seem to be readily available.
 

Mel

Moderator
Mar 17, 2007
5,743
1,722
25,935
Visit site
Or how about an A/C unit, if you have spare payload. You will be going to places where It ain’t half hot mum.
You can tell that we are all now seriously invested in your project 😀. Please do keep posting.
Mel
 
  • Like
Reactions: Dustydog
Jun 16, 2023
87
33
585
Visit site
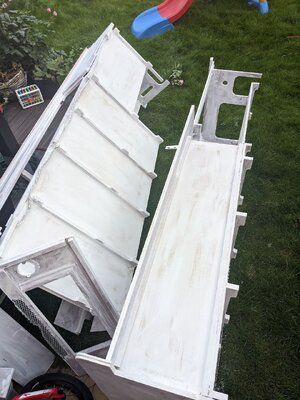
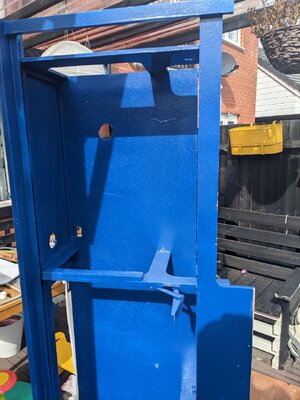
Front beds dismantled, the water tank is removed and won't be back. Planning to build a water gun using its pump.
Also you can see the new wallpapers.
photo_2023-09-30 11.53.35.jpeg

Applying primer to all surfaces
photo_2023-09-30 11.53.00.jpeg


Painting
photo_2023-09-30 11.53.07.jpeg


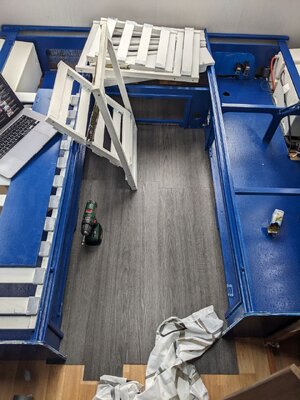
Installing beds back. Decided to keep the current floor and glue a new self-adhesive one on top.
photo_2023-09-30 11.53.11.jpeg
 
  • Like
Reactions: Dustydog
Jun 16, 2023
87
33
585
Visit site
There are many small upgrades happening during the process. I'm not a blogger so unfortunately won't be able to capture all of them in details. I'll be sharing more details as we progress.

A few things to share for now:
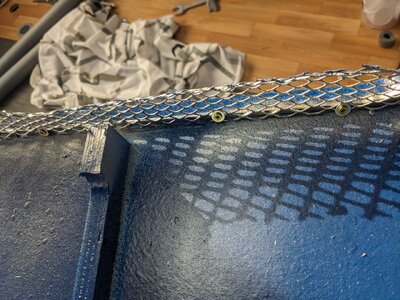
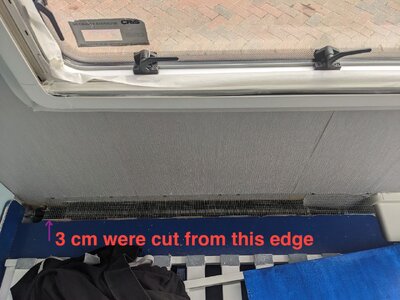
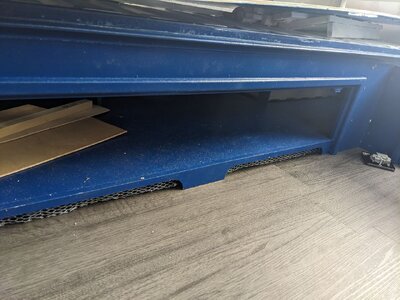
1. There is a metallic mesh along the beds' bottom edges, I guess not just from the aesthetics perspective but also to ensure proper airflow for the heating. It broke in a few places, came loose, lost its form, and, what's worth - became so sharp on the edges that it cut my fingers to the blood several times.

I tried to restore its form using pliers and then re-attached using screws and washers.
2023-10-01 14.11.35.jpg
2023-10-01 14.11.25.jpg


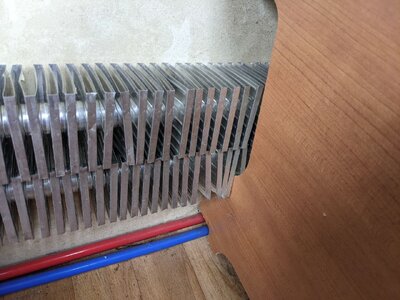
2. The other thing is the heating airflow.. Upon installing the beds back I realised the space left between them and the walls is quite narrow - the bed frame overlaps the radiator by a few centimetres without any gap! Which means:
a) the bed is actually physically lying on the radiator - which is totally wrong
b) about 50% radiator's heat is going into the bed
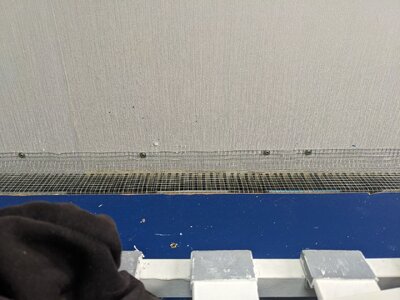
So I decided to cut about 3 cm from the beds' edges - was easy using a circular saw and to cover the gap with a metallic mesh.
photo_2023-10-01 14.29.57.jpeg

photo_2023-10-01 14.30.02.jpeg
 
Jul 18, 2017
14,553
4,374
40,935
Visit site
The metallic mesh could be what the previous owner installed to prevent things falling down the back of the bunks in front. We have the plastic mesh instead of metal.
 
Jun 16, 2023
87
33
585
Visit site
The metallic mesh could be what the previous owner installed to prevent things falling down the back of the bunks in front. We have the plastic mesh instead of metal.
The mesh on the last 2 photos I installed myself, the one on the first two runs at the bottom:
 

Attachments

  • photo_2023-10-01 16.12.07.jpeg
    photo_2023-10-01 16.12.07.jpeg
    209.3 KB · Views: 6
Jun 16, 2023
87
33
585
Visit site
A few interesting engineering approaches I can't explain:

1. No time to find a proper cap with 3 holes?
photo_2023-10-22 21.54.57.jpeg

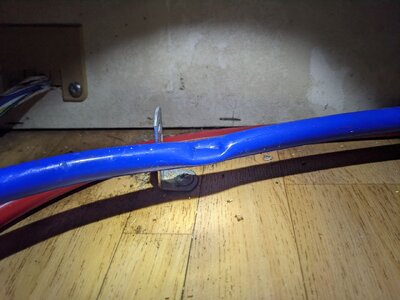
2. 12v cable is stuck forever between floor and wall:
photo_2023-10-22 21.54.52.jpeg

3. Battery mains - let's cut the isolation and leave it like that? Also the fuse looks like it was added after the van was built
photo_2023-10-22 21.54.38.jpeg

4. The very rear radiator is not screwed into the wall from both sides... Just resting on the furniture
photo_2023-10-22 21.54.43.jpeg


5. In case you suspected your cold water pressure isn't great.. As I understand, there was not enough pipe length so they had to do a very sharp turn AND also they very tightly clamped the pipes there.
photo_2023-10-22 21.54.33.jpeg


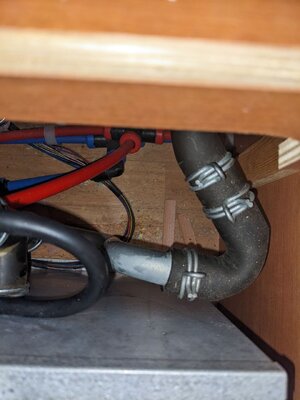
6. And if the wet heating is a bit slow... check for pipe kinks added by the manufacturer:
photo_2023-10-22 21.54.48.jpeg
 

JTQ

May 7, 2005
3,586
1,392
20,935
Visit site
It's the caravan building industry after all, what do you expect? ;)
Them to do things correctly? No, it's not in my experience their elected way, it's just get it out of the door.
 
Last edited:
  • Like
Reactions: ProfJohnL
Jun 16, 2023
87
33
585
Visit site
Regarding the last picture got the official response from Alde:

Yes, sir, that rubber joint is too badly kinked. Either the pipework needs reseating so it doesn't kink, or that corner redesigned.

Well.... Thank you Swift Group for the build quality.

I've got another issue with the wet heating that I discovered/fixed during the work on the project. Stay tuned :)
 
Jun 16, 2023
87
33
585
Visit site
So fixing the kinked heating pipe isn't a big issue. I even could reuse one of the current rubber joined, if anyone needs the second one - let me know :)

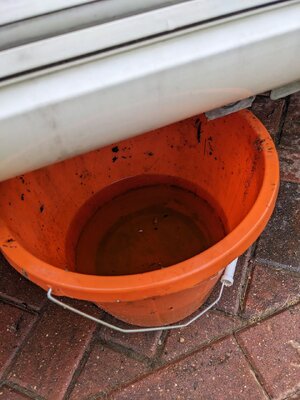
1. First, drain the antifreeze. The plug on the drain pipe fired like a bullet when I loosened its clips, took me a while to find out which led to too many antifreeze leaked.
2023-10-26 09.59.31.jpg


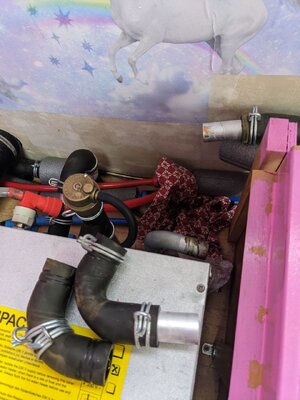
2. Removing 2 rubber joints that were forming S curve. The U-shaped pipe needs to be rotated
photo_2023-10-26 10.00.02.jpeg

3. Normal vs kinked
photo_2023-10-26 10.01.02.jpeg


4. Rotating the U-shaped pipe and connecting it with one rubber joint only
photo_2023-10-26 10.02.26.jpeg


5. Adding antifreeze back, draining, heating, testing - all good. Took less than an hour.
And I wonder why Swift couldn't do it themselves?..
 
Jun 16, 2023
87
33
585
Visit site
That is a lot of progress. Like the seating fabric. Well done
Mel
Yeah the upholstery was a tough task as we bought the fabric only. Not only it required a well measured sewing process but also all foams has to be soaked in winegard & baking soda in our bathroom in order to get rid of the stains and the old stink.
 
Mar 14, 2005
18,372
3,639
50,935
Visit site
It's good see the progress you are making, and your pictures and comments about the construction as you have uncovered them reinforce my own views of how poor UK caravan design and manufacture continues to be.

Kinked pipes, and exposed electrical conductors are the sorts of issues that may only be found when stripping down a caravan, but it proves the manufacturer's do not adhere to the appliance manufacturers fitting and wider safety regulations.

Well at least if the heating system was compromised, they had kindly provided another way of keeping the caravan warm by battery heating :devilish:

How many other ways can they devalue their own products?

But back to what you are doing. Even though you are refitting the caravan, do bear in mind the Maximum Technically Permitted Laden Mass (MTPLM) does not change. I mention this because often the materials DIY'ers can access are not as light as the OEM's and so the loading capacity may be smaller than previously. It may be worth getting the finished but empty caravan weighed so you know what loading margin you have.
 
Jun 16, 2023
87
33
585
Visit site
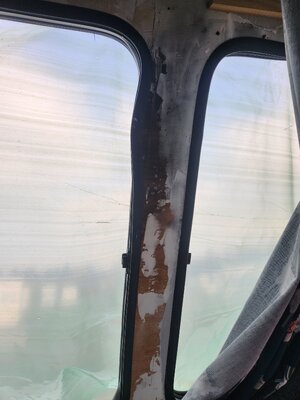
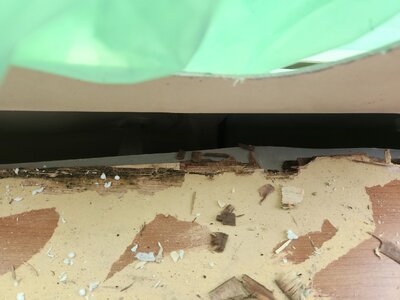
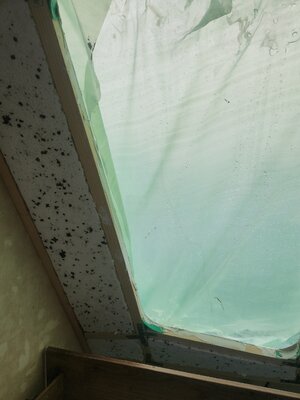
Found a leak this spring - front window rail had been leaking through screws for a very long time (probably years). I guess it went unnoticed because the caravan was stored indoors and the previous owner thought the issue was in the window seals.

It leaked from the rail down to the front shelf, which turned out to be a pain to replace.

1. Wet front
20240307_114952.jpg


2, Top view
20240307_121131.jpg
 
Jun 16, 2023
87
33
585
Visit site
3. Fully dismantling front windows timber structure (caravan is OK, it's just the perspective :))

20240316_105325.jpg


4. Front shelf is rotten and smells mushrooms

20240317_104029.jpg
 
Jun 16, 2023
87
33
585
Visit site
What's not shown, unfortunately - is the process of removing the front shelf, cutting the new one with the proper shape, re-attaching the aluminium sheet underneath it and screwing the front handlers back in.

In total it took a couple of months afterwork time
 
  • Like
Reactions: toad a caravan

TRENDING THREADS

Latest posts