Project Lunar Micron

Apr 28, 2011
506
0
0
Visit site
I thought i would share a few Pictures of a project i did a few years ago.
After years of camping in a tent and the problems with air beds going down in the middle of the night and having to worry about cooking outside (sometimes in the rain) My wife and myself decided to buy a caravan.
Not knowing if we were going to enjoy caravanning we decided to buy something cheap, So onto Ebay we went and found a caravan about 30 miles away with a "Buy it Now" price of £200. After emailing the seller i took the plunge and bought it, went to view the van the next day and wished i had'nt
smiley-laughing.gif
bought it but thought that for £200 what else could you get.
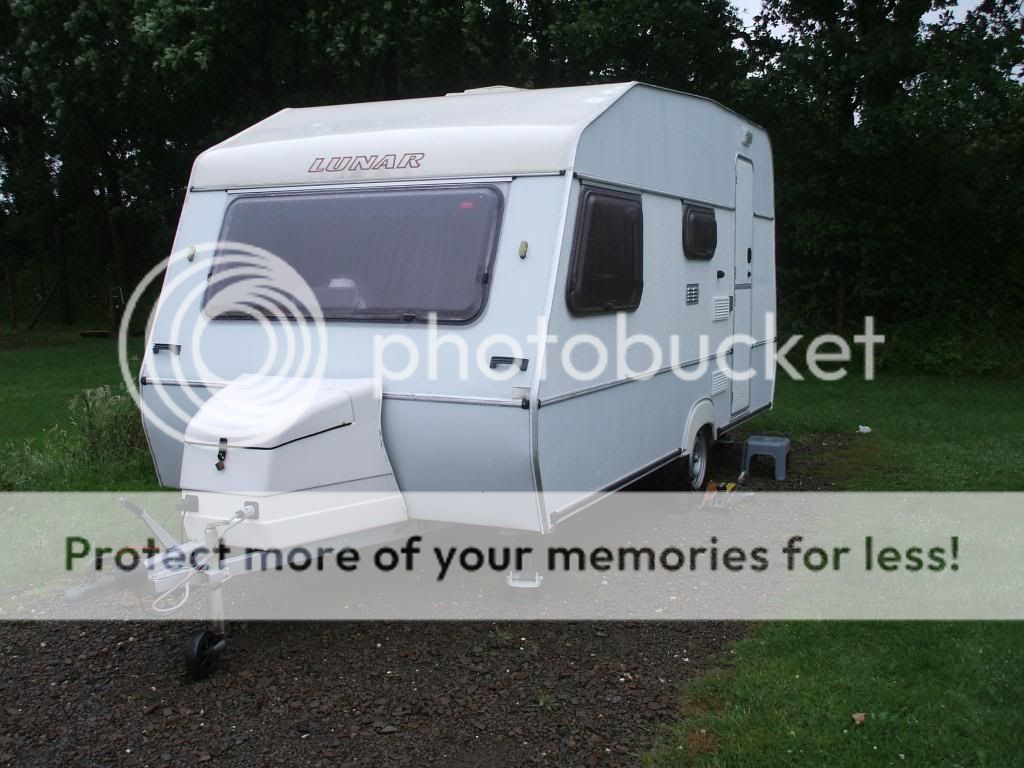
The following weekend the seller delivered it to me as i had no tow bar fitted to the car at that point and i was now the proud owner of a 1986 Lunar Micron,
That very evening things started to look very bleak for this little van finding major damp at the front and sides with rotten timbers, The next day i managed to unscrew all the furniture and cut the old rotten timbers out and get a dehumidifier in and switched on.
DSCF0288_zps4fed8b33.jpg
DSCF0291small_zps1bab1e7a.jpg


After a few weeks of drying out i started to renew the timbers at the front of the van and around the window, i would at this point like to let you all know that the cause of all this damp was not only the window rubber but the front panel on the outside was split.
after i sorted the timbers out i ordered a sheet of alluminium and replaced the front panel, resealed the awning rail and extrusion rails etc as you can see in the next pictures.
DSCF0293_zpsb22b2d11.jpg

DSCF0294_zps2315961c.jpg

DSCF0295_zpsd1f57a13.jpg

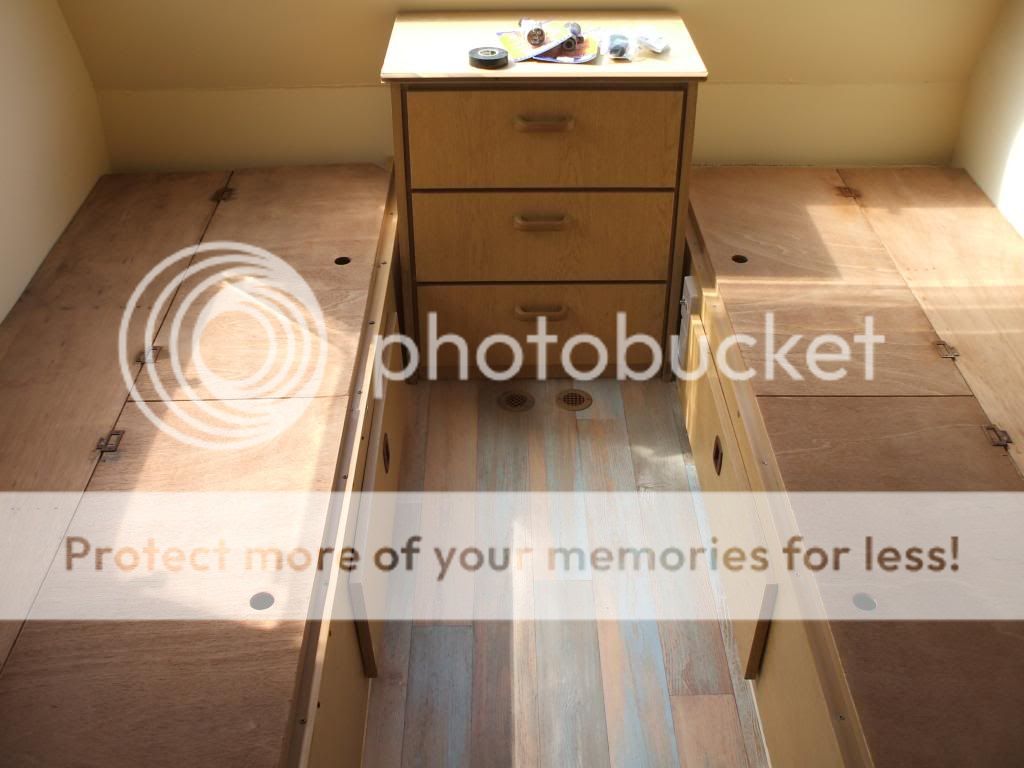
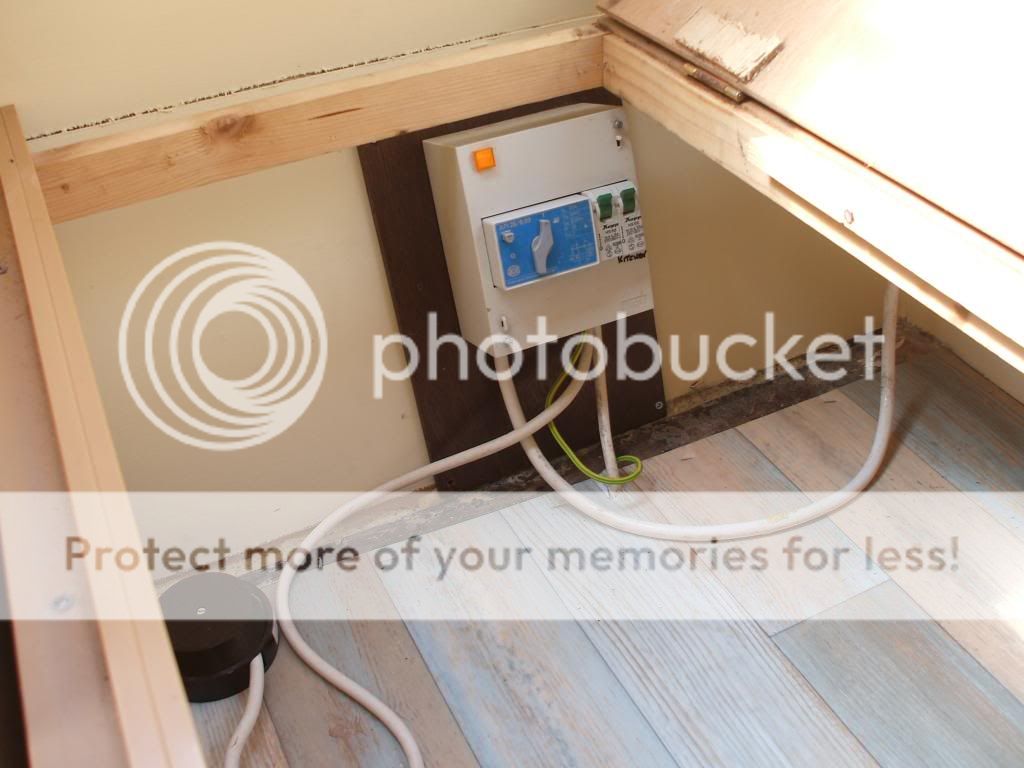
Now all the time i was doing this i found that the rear internal timbers and floor just inside the door was rotten so this posed a bit of a problem as i couldnt replace the whole floor so managed to cut the peice out that was rotten and replaced it bracing it underneath with timbers bolts and stainless screws.
DSCF0411_zpsd90f1859.jpg

DSCF0412_zps17534987.jpg

DSCF0413_zpsd79c15ed.jpg
 
Apr 28, 2011
506
0
0
Visit site
Once this was all done it was time to ply the interior as the wallboard was no longer available and i painted the whole interior with the help of the other half and the cat.
DSCF0417_zps79dc4c0d.jpg

DSCF0418_zps165e0a4a.jpg

DSCF0434_zps8a903e91.jpg

DSCF0446_zpsb99ab475.jpg

DSCF0464_zpsd17aeb59.jpg

I then Started to concentrate on the outside as the paintwork on the outside was looking a bit worn i decided to hand paint the van with smooth hammerite after using red oxide to get the paint to key to the alluminium.
DSCF0448_zps1d7930bf.jpg
 
Apr 28, 2011
506
0
0
Visit site
With the outside and inside painted it was time to replace the window rubbers.
DSCF0452_zpsf904eff1.jpg

We cleaned the kitchen sink up fitted new hinges and renewed the water and waste pipes, There was no Flue fitted to the fridge when we pulled it out so fitted a new and new external vents.
DSCF0439_zpsb40f0c63.jpg

Fitted new flooring, bed boxes and centre chest or drawers.
DSCF0456_zpsea9e9b0e.jpg

DSCF0460_zps95240332.jpg

Then rewired the 240v, 12v and towing electrics.
DSCF0443rotated_zps2a149c0a.jpg

DSCF0454_zps73a87e91.jpg

The battery was in a box in one of the bed lockers just out of shot.
The other half get to work with the soft furnishings while i was doing the electrics.
No blown air heating here
smiley-laughing.gif

DSCF0457_zps08da1c2e.jpg

Cusions back in.
DSCF0465_zps7fdbca2d.jpg

Home made curtains and blinds all in.
DSCF0483_zpsfcbe653f.jpg

Windows all machine polished.
DSCF0484_zps8f781763.jpg

The finished product Not bad for a van that was 23 years old at the time, there were other things that i did to the van like put new tyres on and wheel covers and painted the whole of the floor under the van with PVA glue as a friend said it would help with stopping watter penatrating,
DSCF0574_zps52e038b5.jpg

I wanted to paint the whole van white the only trouble was i didnt buy all the paint at the same time and found that Hammerite have 2 shades of white
smiley-surprised.gif


I hope you all find this interesting reading and gives some people the push to take the bull by the horns and have a go at things yourself.
This project took me about 8 months of weekend and evenings to get it done we then kept her for 2 years before buying a newer van.
 
Apr 28, 2011
506
0
0
Visit site
A few days caravanning on Dartmoor
DSCF0598_zps200a823b.jpg

We had a bad thunder storm while there with strong winds and rain it kept us dry and warm.
DSCF0597_zps2e6549f4.jpg

The last outing before we upgraded to a newer van.
10042009_zpse9314fac.jpg
 

Parksy

Moderator
Nov 12, 2009
11,904
2,399
40,935
Visit site
A great restoration project John, thanks for the pictures.
I've had a long held ambition to buy a small older caravan to do up retro style on my front drive but I've yet to persuade Herself that it's a good idea
smiley-smile.gif
 
Apr 28, 2011
506
0
0
Visit site
Parksy said:
A great restoration project John, thanks for the pictures.
I've had a long held ambition to buy a small older caravan to do up retro style on my front drive but I've yet to persuade Herself that it's a good idea
smiley-smile.gif
The van could have done with a professional bodywork job as some of the panels and awning rails were damaged beyond straightening but as the van was never going to be as it was when it rolled out of the factory in 1986 i figured as long as it was dry it was good enough for me.
go for it its good fun as long as you have the room, as you can see i didnt really as i had to park the my car in the garden and the wifes was parked in front of drive, not perfect i know.
If you want to see all the pictures click on the link below
http://s1317.photobucket.com/user/johnandrew70/library/JOHN-PC/Photobucket/Caravan%20restoration
 
Feb 6, 2009
339
7
18,685
Visit site
John, What a super job!
You should be very proud of what you have achieved.
Many of us have thought about undertaking such a project, but, alas, for one reason or another, have fallen by the wayside....
You have achieved what many of us would wish to do.....
Stand by for lots of questions from folks who have been "fired up" by your article and photos....

Incidentally, I reckon your posting would make a jolly good article for the Magazine...... more work though! perhaps Parksy could advise you of the steps needed etc?
Regards
paws
 
Apr 28, 2011
506
0
0
Visit site
I am happy to let someone play with it to make it better for the mag. I am not that good at that kind of thing. I might give some readers the encouragement to do this kind of thing. It was a bit daunting at first but we soon started to have fun.

John
 

Parksy

Moderator
Nov 12, 2009
11,904
2,399
40,935
Visit site
paws said:
.......Incidentally, I reckon your posting would make a jolly good article for the Magazine...... more work though! perhaps Parksy could advise you of the steps needed etc?
Regards
paws
I have to say that when I've drawn the attention of the editorial staff to similar topics and pictures in the past the end result has been...........zilch
smiley-frown.gif

I'm not convinced that anyone at Practical Caravan looks at this forum very often, but they usually respond to things on Facebook, so my advice would be that if John wants to get the attention of PCv then Facebook is the best way to do it.
Just click on the Facebook icon at the bottom right of the forum page and this will navigate to the PCv Facebook page.
 
Apr 28, 2011
506
0
0
Visit site
Woodlands Camper said:
Looks like a lot of hard work, but worth it.

It wasnt hard work, But at times i did ask myself "what are you doing"
smiley-surprised.gif
But it was more of a hobby than a chore, I did enjoy every minute of it. Would i do it again... yes i would.
As long as you have some basic DIY skills it can be done, I also found if i didnt know what to do i Googled it and found the answer.
All i would say is that if you do undertake any electrical work yourself make sure you isolate the caravan from the mains supply and or battery and get an expert to check any work you have done to the electrics or gas appliances.

John
 
Oct 30, 2009
1,542
0
19,680
Visit site
hi John,
brilliant job
smiley-cool.gif
a credit to you, I do agree though it is something one must do at least once in lifetime the satifaction of seeing the completed project and thinking "I did that" is wonderfull. whilst trying to forget the heartache one went through when something would not go right, and had to be modified, my own project was the motorhome completly stripped inside and out down to a shell, redesigned and then rebuilt, it took 18months of every spare minute I had to complete, even in the depths of winter, and cost a fortune but worth every penny when it was finally done and sat on site in the highlands.
sadly I never had the inclination to take photos as it was a personal venture, but as a testiment to ones endeavour it passed 11 succesive mot's without so much as a duff wiperblade, I will bet one thing though you started with a basic tool kit and ended up with a "shed full" some of which were never used again,
your pictures and story brought back all the memories I had forgotten, thanks for that, I would love to do another one, wouldn't you,
colin.
 
Apr 28, 2011
506
0
0
Visit site
colin-yorkshire said:
hi John,
brilliant job
smiley-cool.gif
a credit to you, I do agree though it is something one must do at least once in lifetime the satifaction of seeing the completed project and thinking "I did that" is wonderfull. whilst trying to forget the heartache one went through when something would not go right, and had to be modified, my own project was the motorhome completly stripped inside and out down to a shell, redesigned and then rebuilt, it took 18months of every spare minute I had to complete, even in the depths of winter, and cost a fortune but worth every penny when it was finally done and sat on site in the highlands.
sadly I never had the inclination to take photos as it was a personal venture, but as a testiment to ones endeavour it passed 11 succesive mot's without so much as a duff wiperblade, I will bet one thing though you started with a basic tool kit and ended up with a "shed full" some of which were never used again,
your pictures and story brought back all the memories I had forgotten, thanks for that, I would love to do another one, wouldn't you,
colin.

When i did that project we had a house with garage and a shed,As you quite rightly said i started with hardly any tools at all a few screwdrivers etc and by the time i had finished i had a full collection of power tools and a very large toolbox
smiley-laughing.gif
not to mention the garage full of meterials that had not been used.
A few years after i had finished the caravan we moved house and downgraded into a 2 bed flat without the garage or shed as you can imagine i had to take a lot of stuff to the dump, I still have all the tools and most of them have the stikaflex and other sealant stuck to them to remind me of that van
smiley-wink.gif

Sadly if i wanted to do it again i would have to find somewhere to do it maybe indoors, it was ok doing it on the drive but was a pain having to cover some places with tarpolin and duck tape to keep the rain out. i must say at one point i was working in the van with the heater on and frost outside haha
would love to do it again

John
 
Oct 30, 2009
1,542
0
19,680
Visit site
hi John,
Thought so,
smiley-foot-in-mouth.gif
forgot to mention that the m/home was the reason i got into electrics, I had to redesign and make a new wiring harness, incooperating the 12 and 240v systems of the habitation part with the 12v in the van, I wasn't possible to use stock items as most of these had a single use, but I wanted all the systems to muli task, automatically inc having 240v with/without EHU, I did this by using a small consumer unit for EHU, a pair of 2kw Inverters, a bank of relays and solenoids, plus a really good early smart charger. and 2 huge batteries that were topped up on the move by using an extra alternator driven from a belt that used to drive the "power steering", (after a retro convertion using parts from an earlier non p/s model)
it is suprising how ones skill level increases as time goes on isn't it!!! not just in electrics but carpentry, mechanics,and plumbing, once done never forgotten eh!!.
anyway enough of this trivia, ha ha,
it suffices to say if threads and postings like your project spur on more owners to rejuvinate some of the older vans instead of scrapping them for a little bit of damp
smiley-surprised.gif
it is worthwhile.
once again well done, I hope PC magazine does publish your project in the end!! even if you have to rewrite a story to go with it, with a catalogue of the ups and downs of doing a large project,
 
Apr 28, 2011
506
0
0
Visit site
colin-yorkshire said:
hi John,
Thought so,
smiley-foot-in-mouth.gif
forgot to mention that the m/home was the reason i got into electrics, I had to redesign and make a new wiring harness, incooperating the 12 and 240v systems of the habitation part with the 12v in the van, I wasn't possible to use stock items as most of these had a single use, but I wanted all the systems to muli task, automatically inc having 240v with/without EHU, I did this by using a small consumer unit for EHU, a pair of 2kw Inverters, a bank of relays and solenoids, plus a really good early smart charger. and 2 huge batteries that were topped up on the move by using an extra alternator driven from a belt that used to drive the "power steering", (after a retro convertion using parts from an earlier non p/s model)
it is suprising how ones skill level increases as time goes on isn't it!!! not just in electrics but carpentry, mechanics,and plumbing, once done never forgotten eh!!.
anyway enough of this trivia, ha ha,
it suffices to say if threads and postings like your project spur on more owners to rejuvinate some of the older vans instead of scrapping them for a little bit of damp
smiley-surprised.gif
it is worthwhile.
once again well done, I hope PC magazine does publish your project in the end!! even if you have to rewrite a story to go with it, with a catalogue of the ups and downs of doing a large project,

Thanks Colin
I had thought about installing an inverter to power the exhisting 240v sockets in the van but never know how. to be honest i dont know whether i would need it as i am always on hookup but there maybe that one night that we will park up in a services or somewhere and we dont own a gas kettle
smiley-laughing.gif

My next project on my exhisting van will be a solar panel on the roof i think but still aprehensive of drilling holes in the roof even though i did all that to the Lunar, i guess its because our new van costs a fair bit more haha.
As i have said earlier i am well up for the Mag to use what i have written here and the pics if they need it written properly i would have to get the other half to write it as i an useless.
John
 

TRENDING THREADS