Mega damp in rear corners

Jul 15, 2015
18
3
18,515
Visit site
Hi

I've bought an Elddis Crusader Hurricane 2 berth 2005 that has some damp issues. It came at a really good price because of said damp issues. Or so I thought!

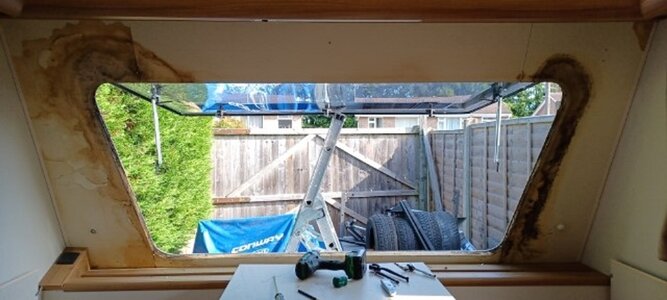
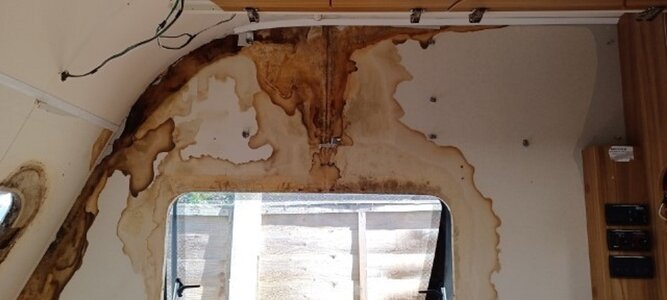
I now realise the damp underneath in the rear corners is much worse than it initially appeared. The guy I bought it off said it had been sitting out in the rain for days and when I was under it feeling around it seemed completely dry.

I think that was a lie cause it's sat outside our house a couple of days in the rain and the rear corners are like a sponge underneath!

I expected to be replacing the boards at the corners cause the wood was soft but now it looks like I need to seal it up top first. I've had a fair few issues with different vans over the years but not this one so I'm not totally sure how to go about fixing it.

I'm assuming the water is coming in through the rail near the back of the roof so I thought I'd remove that, apply some new sealant, and screw the rail back on. Sealant I was going to use is Sikaflex 522.

I'm hoping this ingress hasn't been going on so long that the timber frame is affected. That's assuming it has a timber frame I know nothing about this van at this stage.

The rest of the floor is dry and solid and I can't find any sign of water actually getting inside the van. It's just the corners of the underbelly. However, if I start doing the corners underneath and find that the rot is bad then I guess I'll need to remove the whole rear panel? Is that how you get access to those parts of the frame?

Anyone know of any resources on this sort of thing that might help me get it sorted? Id like to get ahead of the game here just in case I find its the worst case scenario in there.

Cheers
 
Sep 23, 2023
555
168
935
Visit site
I've put a post on awning reseal under the "vintage section" it shows the method I removed,cleaned and refit mine.One problem that can show itself is that rain water running down the awning rail collects on the underneath corners where the end panels marry up to the caravan floor and collects.. It's a simple fix to stop it...Gary good luck
 
  • Like
Reactions: GaryB
Jan 20, 2023
1,075
908
1,435
Visit site
When repairing damp, always expect it to be twice as bad as you imagined plus a bit more! A friend found some corrosion on the outer skin of his 2014 Elddis, stripping it out revealed the true horrors. He took his time and repaired a section at a time and it looked great afterwards, the thing that was surprising was just how little sealant had been used at the factory.

I've also removed and resealed awning rails in the past, it's straightforward BUT ensure you have help as it's tricky to manhandle an awning rail without bending it (or dropping it and getting grit and muck in the fresh sealant!).

lee-damp1.jpg
lee-damp2.jpg
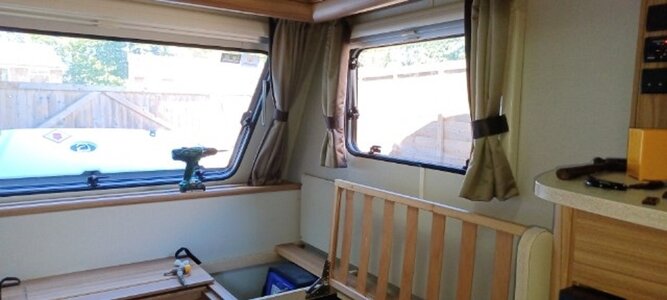
lee-damp3.jpg
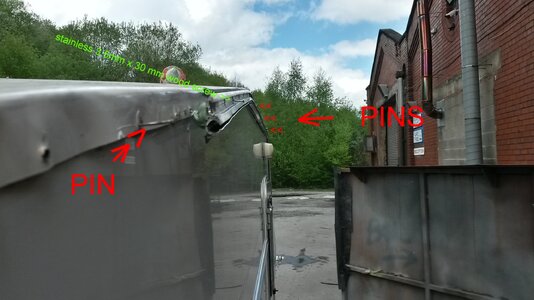
lee-damp4.jpg
 
Apr 23, 2024
5
2
15
Visit site
I have repaired three Elddis Xplores fronts his year with the same problem, also had one that had the back corners damp and as one poster says the water runs down and wicks around the back panel onto the underside of the floor. forming a gap between them is good so any water drips off is a good method, Also seen the same of Baileys and Swifts. On the Xplore model the back ABS panel is not the true back wall and the rear top capping piece between the roof panel and the ABS back panel can develop cracks/weakness which then water runs down the inside wall ( the true back wall) and soaks the framing timbers, also a big fix.
 
Jul 15, 2015
18
3
18,515
Visit site
Hi all

I've made a start! The rear roof rail looks to have been where the rain was getting in. Parts of it came off really easily. Looks like someone has already resealed it and I'm not sure it's the best job. The rail is all bent cause whoever did it previously screwed it down really tight. Not sure if that's normal. I thought spacers to make sure there's a significant cushion of sealant? What's the view on that? Do I need to buy a fresh roof rail or bend it back into shape maybe?

Also whoever did it previously looks to have squirted sealant in between the two skins. Again I'm not sure if that's the right thing. It didn't feel quite right somehow! Maybe someone can advise on that too.

Took a very long time to get the rail off cause the bits that were still stuck on well were really stuck! I'll wait for some feedback before I go any further. I think my hands prob need a day to recover anyway!

Cheers!
 
Jul 15, 2015
18
3
18,515
Visit site
Hi

I've just spent my lunch scraping the stuff off the underside of the rail, which is indeed aluminium. I'll have a go at the residue it's left with some turps later.

I actually paid for this thing a while ago called my idealcaravan and they have an ai bot that you can ask questions. I asked it what to put in the gap between the two skins and it said sika 512 but surely that would be like gluing them together forever! I did ask it what to seal all kinds of things with and the answer was 512 every time so maybe it just interprets sealing jobs as needing 512 and that's all it knows. Or maybe it's right...

Elsewhere i've seen people say it's a non setting mastic that should go in there if it needs replacing. I'm not sure who to trust now. Humans or the robots!

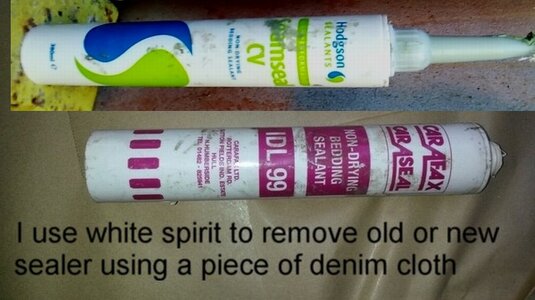
Either way I'm going to have to replace that stuff with something cause it was coming away in places as i was removing the rail. I've ordered some of that hodgsons stuff just to cover all the bases.

Anyone have a strong opinion on what to put in there? And if it's ok to use the two different sealants together as in they wont react with each other?

Advice much appreciated. The further i get into this job the more of an unknown it becomes!
 
Sep 23, 2023
555
168
935
Visit site
If you look at my post in the vintage section it may be of help.Caraflex is what I used on my 92 abbey rails.caraflex bitumastic allows the panels to rails to expand and contract and is a flexible seal.It was used by manufacturers.It was made near to Cosalt and swift etc in Hull.I've removed all my aluminium rails, battery boxes and what not...replaced all screws with stainless steel,replaced screw covers (Herzim strip) and side buffer strip..also I have several manuals for carver,Electrolux and spinflo,,,if your need any let me know I'll see if I can post them on this forum...good luck. Gary
 
Jul 15, 2015
18
3
18,515
Visit site
Hi

I don't think so. The sirrocos I've been able to find online are big twin axel beasts. Mines a crusader hurricane 2 berth just.

Terps worked well on the rail by the way. Used a wire brush too but the terps really seemed to help loosen it up. It's super clean now so ready for the sealant when it arrives.

And it was quite easy to get the bends out of it too so it's nice and straight as well.
 
Apr 20, 2009
5,560
931
25,935
Visit site
Another tip from this forum when I did my major damp repair years ago was after cleaning with turps get yourself some methylated spirit and wipe over the area and it will clean the residue left behind from the turps. I did use the 512 on my van.
 
  • Like
Reactions: Dustydog
Sep 23, 2023
555
168
935
Visit site
Rather than use a wire brush I used a piece of denim on the panels(so as not to damage paint) and a piece of copper pipe flattened on one end for rails.When applying new sealant on to rails I warmed the cartridge nozzle with boiling water crushed the end and cut it so enabling a flat bead to be applied
 
Jul 15, 2015
18
3
18,515
Visit site
Thanks guys. Really good tips.

Really cold outside today but it's dry at least. Still need to clean out the rest of the old non setting stuff from the seam and the new sealant prob won't arrive till tomorrow. It's turning into an epic this!
 

TRENDING THREADS

Latest posts